How To Mint An NFT
Follow these steps to mint a free WKSHP NFT.
*Adapted with permission from our friends at Early Majority
Step 0:
Understand and Prepare
Your wallet is essentially your web3 credit card and your login credentials all rolled into one.
But it is also, by definition, a place in the blockchain that belongs only to the person that has the Seed Phrase (key).
Your Seed Phrase is EVERYTHING.
NEVER SHARE YOUR SEED PHRASE WITH ANYONE
No one will ever need to know it, unless they are trying to take something from it!
Write it down on paper, and then store that paper somewhere safe or better yet, store it in a secure password manager. Make multiple copies of it and store them in different places in case of emergency.
Don’t store your Seed Phrase on a cloud connected service (i.e. iCloud, Dropbox, etc)
Once you’re set up with a wallet app - you won’t really need your seed phrase. It’s not something you’re going to have to pull out and use on a regular basis - your Metamask password is what you’ll need more often.
Action
Before you go further, think about out how you’re going to store your seed phrase and then download a desktop browser like Chrome or the web3-friendly Brave Browser (based on Chrome) - most of this won’t work well in Safari.
After you’ve done that it’s a good idea to install the free extension Wallet Guard - this is a tool to help prevent malware or other bad actors from accessing your web3 wallet.
Step 1:
Set Up Your Wallet
There are different ways to access your Ethereum wallet.
MetaMask is the most popular but Coinbase Wallet, Trust Wallet and Rainbow Wallet are other popular choices.
When you create a wallet, you’ll end up with a ‘Wallet Address’ - a 42 character string of numbers and letters that start with the “0x”.
This is a public address, kind of like your email address - anyone can send something to it. There’s an added twist - anyone with your address can see what’s in your wallet as well.
Most web3 activities can be experienced on Desktop or Mobile, but it’s a good idea to start by creating your wallet with the Desktop app and then using your seed phrase to access your wallet on Mobile.
This will allow you to easily see the NFT you mint since the Desktop wallet doesn’t show NFTs but the mobile wallet does. 🥴
Action
Set up your Metamask wallet in your desktop browser.
Download Metamask for your phone and use your seed phrase to restore your wallet. Now you can view your wallet in both places
Step 2:
Add Ethereum
Now that your wallet is set up, you’ll need to add some Ethereum to mint NFTs. Even if you’re minting a free NFT, you still need a little bit of Ethereum to pay the transaction fee (aka ‘gas fee’), because the wallet requesting the mint is required to send the transaction fee.
The simplest way to buy Ethereum is through the ‘Buy’ function in your wallet.
Another common way to buy Ethereum is through an Exchange like Coinbase and then sending it to your wallet address. This is a good way to get to understand how funds and NFTs move through the Ethereum network.
Either way, expect to complete some digital paperwork and connect your bank account to make the purchase.
Step 3:
Practice
Before you mint and spend your ETH, it’s a good idea to try is using your wallet to log on to a web3-enabled site.
OpenSea.io is the largest NFT marketplace, and so it’s a good place to familiarize yourself with and a safe place to try logging in for the first time.
To log in, simply visit OpenSea in your browser with your wallet installed and click the Connect Wallet button and follow the steps.
REMEMBER:
Always verify that the site you are looking for is linked from an official source. Only connect your wallet to sites that you trust
Action
From the main Metamask tab, click the ‘Buy’ button, scroll down and select MoonPay, and begin following the prompts to complete your purchase.
Action
Visit OpenSea and connect your wallet to practice logging in using your web3 skills.
Frequently Asked Questions
What is a Blockchain?
The Blockchain is a decentralized database shared by millions of computers. Bitcoin was the original blockchain and Ethereum is also a blockchain. It’s a deceptively simple concept that enables a vast array of interactions that weren’t possible before because it removes the need for an intermediary.
What is an NFT?
An NFT (‘Non-Fungible Token’) is a digital certificate of authenticity that is attached to a photo, video, or work of art. It is stored immutably on the blockchain, making it more efficient than a paper certificate of authenticity. Each NFT has unique properties reflected in their digital contract, and each NFT has a unique Token ID.
Why would someone buy an NFT?
NFTs have many different types of uses, from collecting digital art or fan memorabilia, to membership passes for different types of communities. Some people buy and sell NFTs to try to make money, and other people buy NFTs to join communities that interest them.
Where can I buy and sell NFTs?
The most popular marketplace today for buying and selling NFTs is called OpenSea. But there are others that are gaining popularity, and more and more marketplaces are launching all the time. LooksRare is a community owned marketplace that shares fees with users, and Magic Eden is another marketplace that recently expanded from Solana NFTs into Ethereum NFTs. There are even some very cool NFT market places more focused on fine art or music NFTs, like Foundation, Royal, Sound.xyz and Nifty Gateway. Even Game Stop opened an NFT marketplace this year!
What are some good resources on Blockchain and NFTs?
The Non-Fungible Token Bible: Everything you need to know about NFTs
Going Bankless: The Ultimate Guide
The Boys Club and BFF communities focus on helping women and non-binary people learn about web3, and their resources are completely awesome.
Step 4:
Mint
Now you’re ready to connect your wallet and mint something.
Let’s start with an NFT of our WKSHP logo, as your way of remembering your completed this guide.
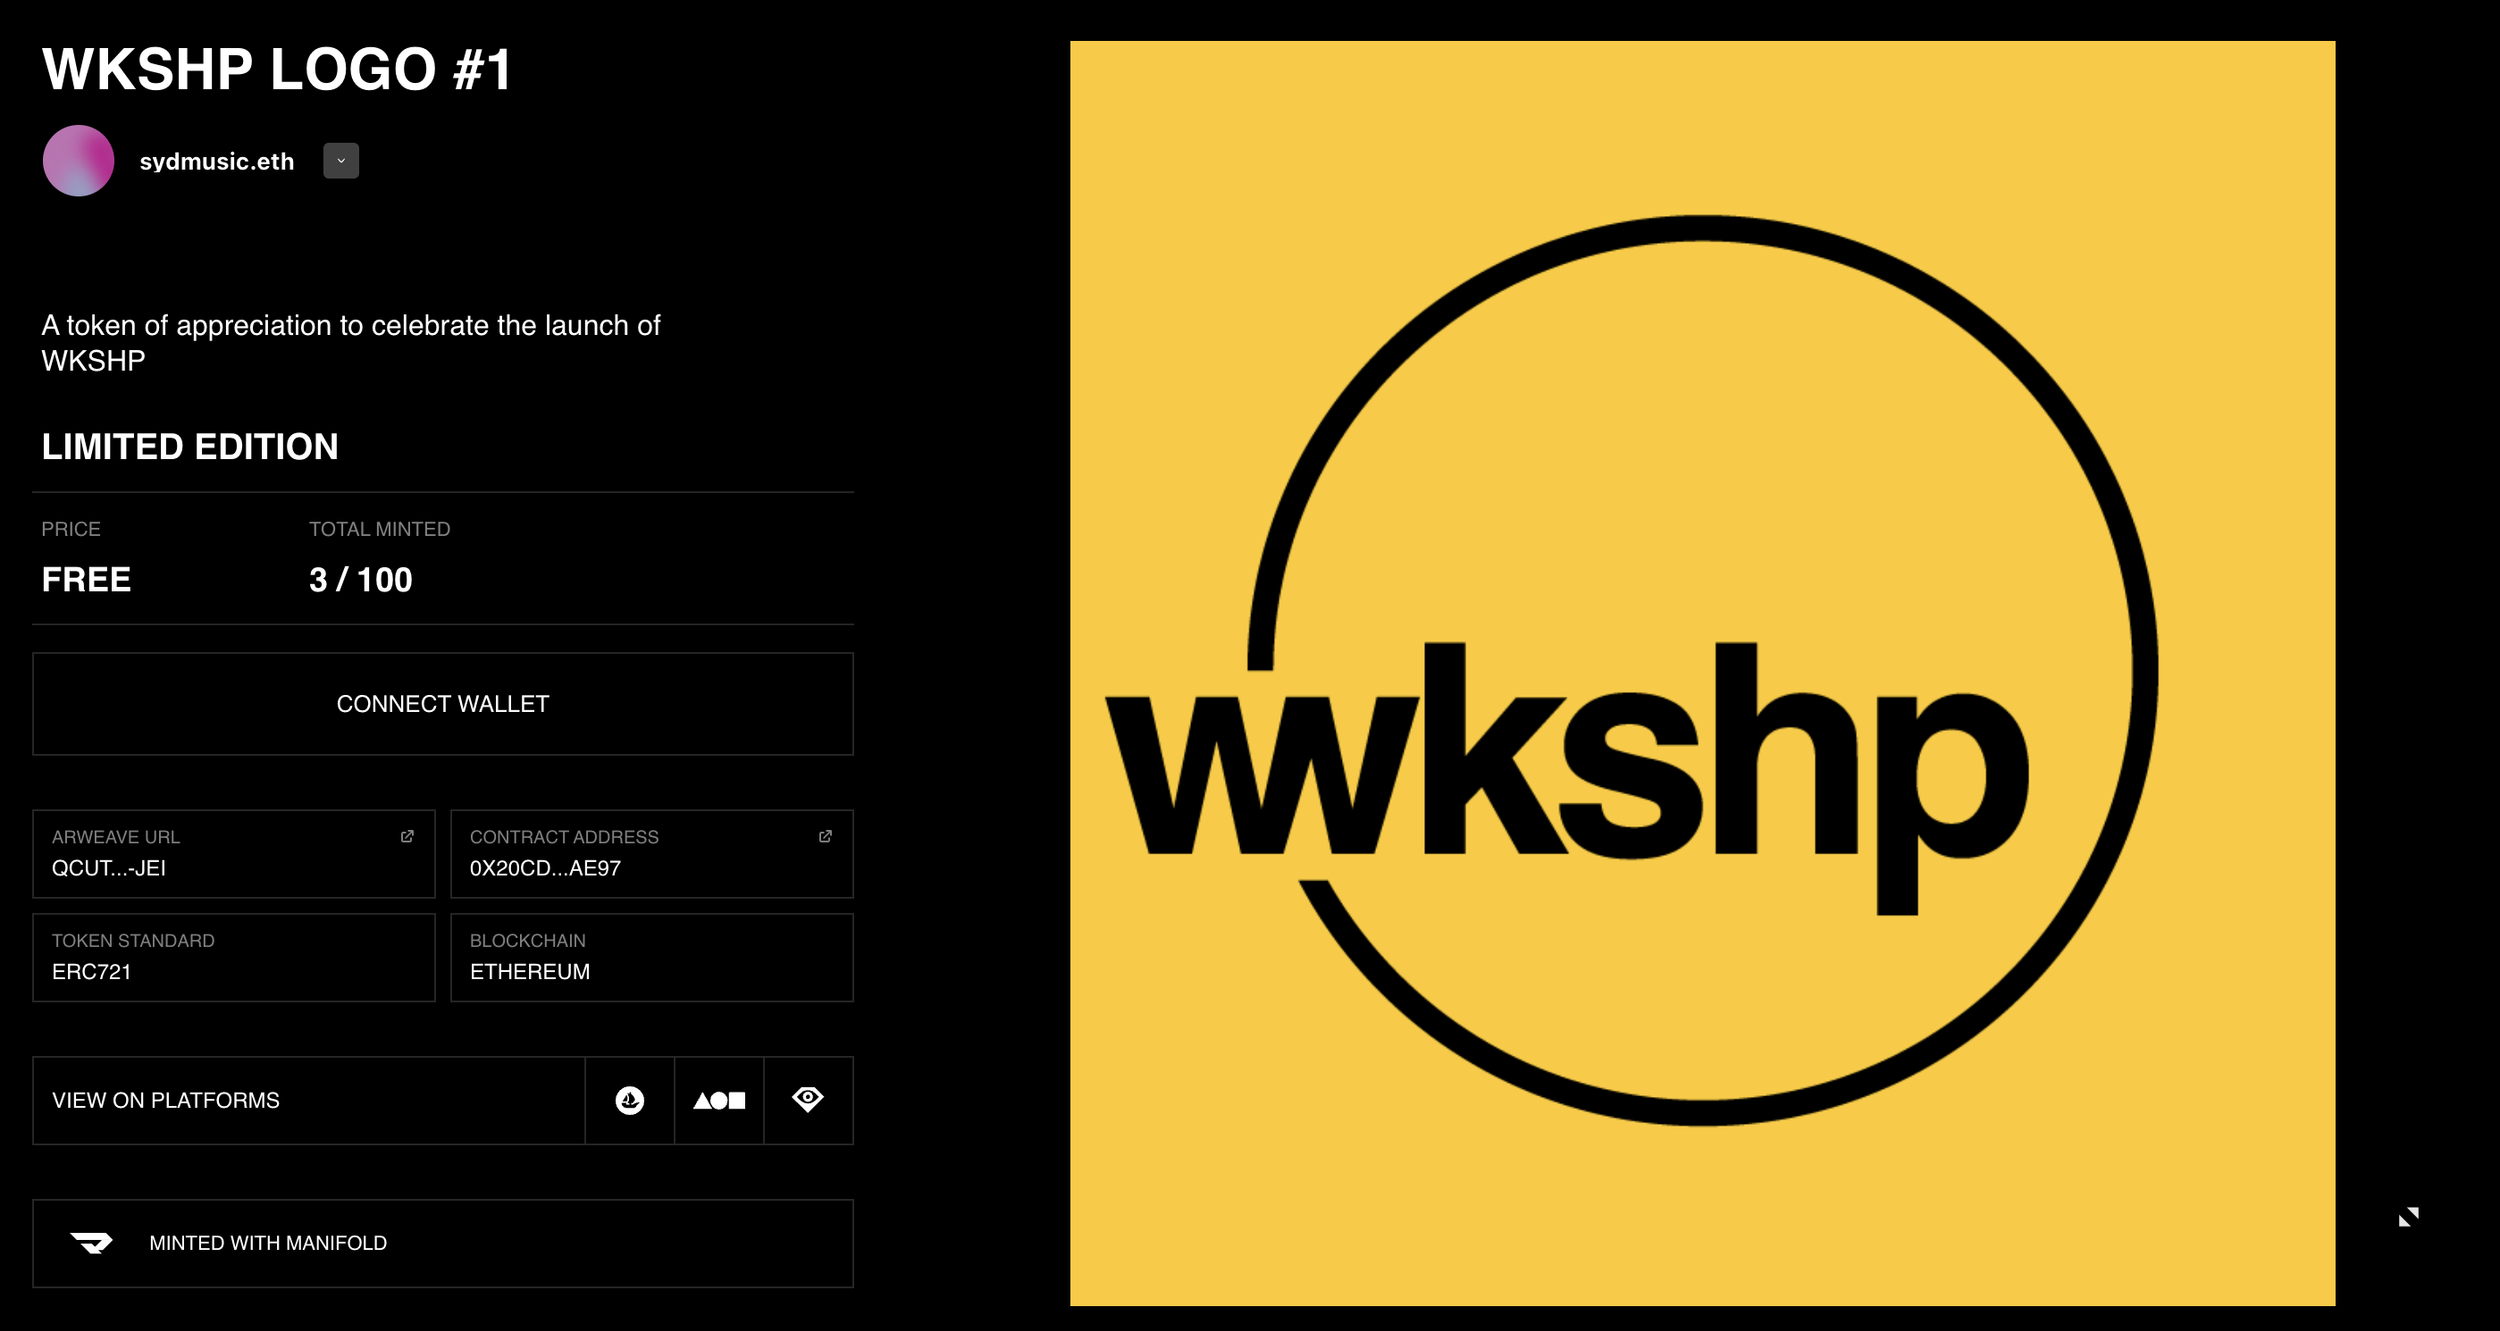
Press CONNECT
Choose Metamask
Follow the prompts to connect in Metamask
Press Claim Token
Confirm the Transaction in Metamask and pay the gas fee.
Once you complete that step, the transaction is submitted to the blockchain and the NFT is minted and placed directly in your wallet.
🎉 You’re done!
One strange thing to note is that the MetaMask desktop extension does not show your NFTs (even though the mobile MetaMask app does!).
So to confirm that you’ve actually minted your NFT either open your wallet on your mobile device or log into OpenSea with your wallet where you will be able to see your new NFT on your profile.